

Managing Components
SketchUp includes a utility to manage your components, and we’ll take a look at it in this task.Here’s how it works:
1. Start SketchUp. For this task, we’ll work with the Engineering–Feet template we’ve used in the previous tasks.
2. Click the Start Using SketchUp button.
3. Select the Window menu’s Components item. This will open the Components dialog box you see in Figure 6.12. (I’ve used the mouse to enlarge the Components dialog, dragging one corner, to make what’s going on in the dialog box clearer.)

FIGURE 6.12 The Component dialog box.
4. To see the components you have in the current model, click the down arrow next to the house button, and select the In Model item. This will display the page you see in Figure 6.13.
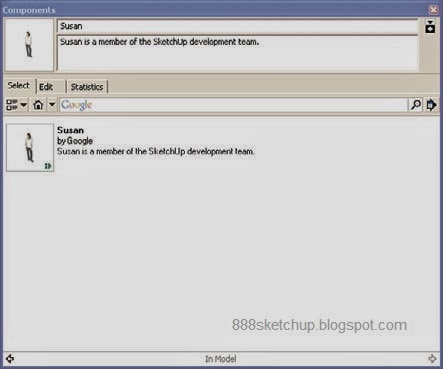
FIGURE 6.13 The current component in the model.
Because the only component in the model currently is the human figure that SketchUp shows on startup, that’s the only component (named Susan in SketchUp 8) that appears in the dialog box when you ask to see all the components in the current model.
5. To insert an instance of a component into your model, click that component. Doing so makes the component instance appear at the location of the mouse cursor.
6. To place the component instance in your model, just move the mouse to the location at which you want the component to appear, and click it. The component becomes anchored to the location of the mouse click.
That’s it—that’s one way to manage your components. Take a look at the next task for another.
Thanks :
Steven Holzner,
SamsTeachYourself Google SketchUp 8 in 10 Minutes


